
It seems as though things have been changing from day to day (or maybe hour to hour) over the last several months as we figure out ways to navigate a pandemic. Not many things are immune to the affects of the pandemic, no pun intended, and that includes reliable network access. K12 network engineer’s minds have been spinning as school districts grapple to find new ways to provide network access outside of their buildings.
A couple of months ago we were tasked with a project to supply internet-only wifi to selected school parking lots. We came up with a pretty good, low cost solution, that we thought would be an ideal fit. We bought the equipment for a PoC, ran tests, and everything worked very well. We planned on using point-to-multipoint radios; one base radio on top of a school, with one or two CPE radios on light polls in the parking lots. These CPE radios not only provided backhaul to the school network via the base radio on the roof, but they also had a client facing radio that could deliver wifi to devices in the parking lot. When the idea was presented to leadership teams there were valid concerns that we hadn’t thought of. What we didn’t know was most of our parking lot light poles are only energized during certain times and there were concerns about wind loading invalidating light pole warranties. After that idea got scrapped, my supervisor and I had many long conversations about solutions and we finally decided on providing wifi service using LTE backhaul with Cradlepoint routers. It wasn’t the perfect solution but it was quick, reliable, and scalable.
I recalled seeing a solar solution from AccelTex not long ago so I decided to reach out to my ol pal Smitty. Smitty gathered a bunch of requirements from me so that he could tailor a solution to fit our needs. In short order we had a complete solar solution that the Cradlepoint router fit perfectly into! We were very happy with the proposed solution as it was going to quickly meet a need that we had, in a fairly fluid situation.
Smitty and the fine folks at AccelTex were able to get 20 complete solar kits assembled and shipped to us in fairly short order. I was able to have one complete kit shipped to my house (I’m still currently working from home), while the rest were shipped to our office. I received my kit via freight one afternoon and was pleasantly surprised to find the pallet a much more manageable size than I was expecting. I wasn’t sure how many pieces and parts I was going to have to assemble, how much wiring I was going to have to do, and how bulky everything was going to be. This is what I got:

Everything was very well packaged and arrived safely. I began the unpacking process so that I could organize the parts for assembly. Although it is a fairly large piece of equipment when assembled, there were surprisingly few parts.
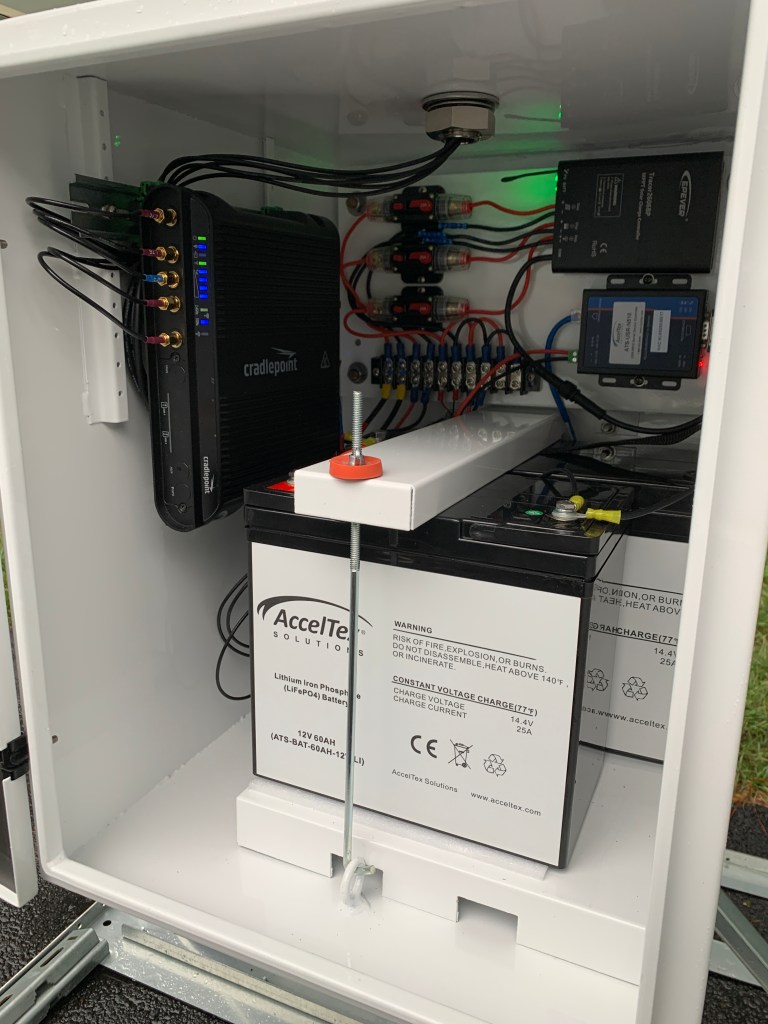
The enclosure, which is the main piece of equipment in the kit, is mostly complete upon arrival. The solar controller, wiring, circuit breakers, LTE antenna, bus bar, and remote monitor are fully assembled within/on the enclosure. To be totally honest, I was a little disappointed that I didn’t have more wiring to do because I enjoy that sort of thing.

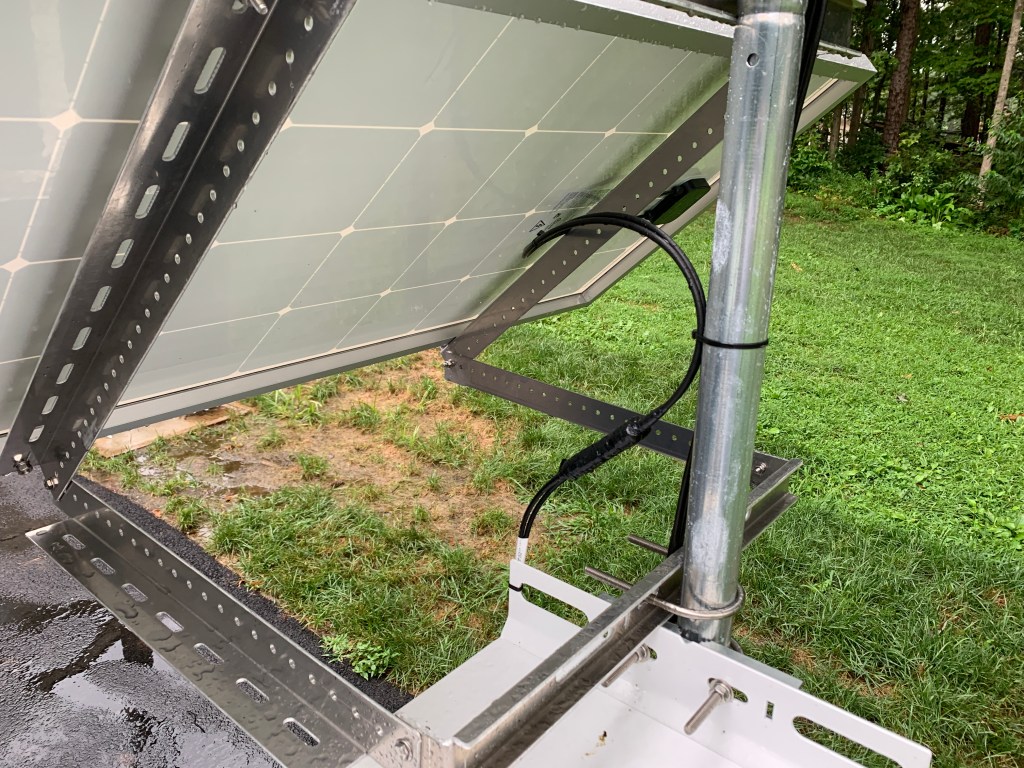
Now that I had everything unpacked and organized, I began building the kit. Smitty had emailed me the kit installation documentation prior to the kit’s arrival. The installation documentation is easy to read and thorough. The install documentation is prepared with the purchaser in mind and includes information such as panel degree tilt which is specific to your location. In our case a clear view of the southern sky at a 51 degree tilt was what we needed.
Assembly is definitely made easier by having another set of hands; something I wasn’t lucky enough to have during my assembly, but I made it work.

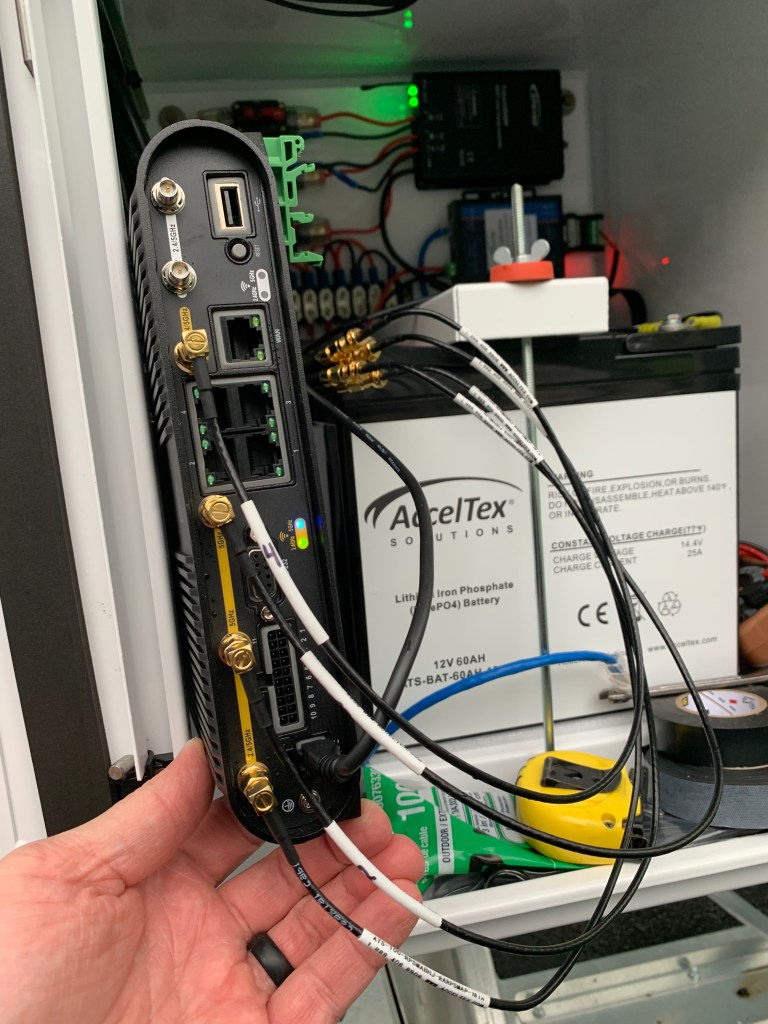
Soldering was not required for our kits but I decided to solder the spade connectors to my Cradlepoint router pigtail so that I knew the connection was good. This was one of the few things that I decided to do outside of the installation documentation to make for a better install. As far as the wiring is concerned, the only connections that need to be made to the system are the leads that go to the solar panel and the pigtail that supplies power to the Cradlepoint router. The bus bar has two additional locations for 12v equipment if you have the need.

This was another point where I decided to go outside of the installation documentation. I ordered some DIN mounts so that I could mount the Cradlepoint router to the DIN rail, which is provided inside the enclosure.
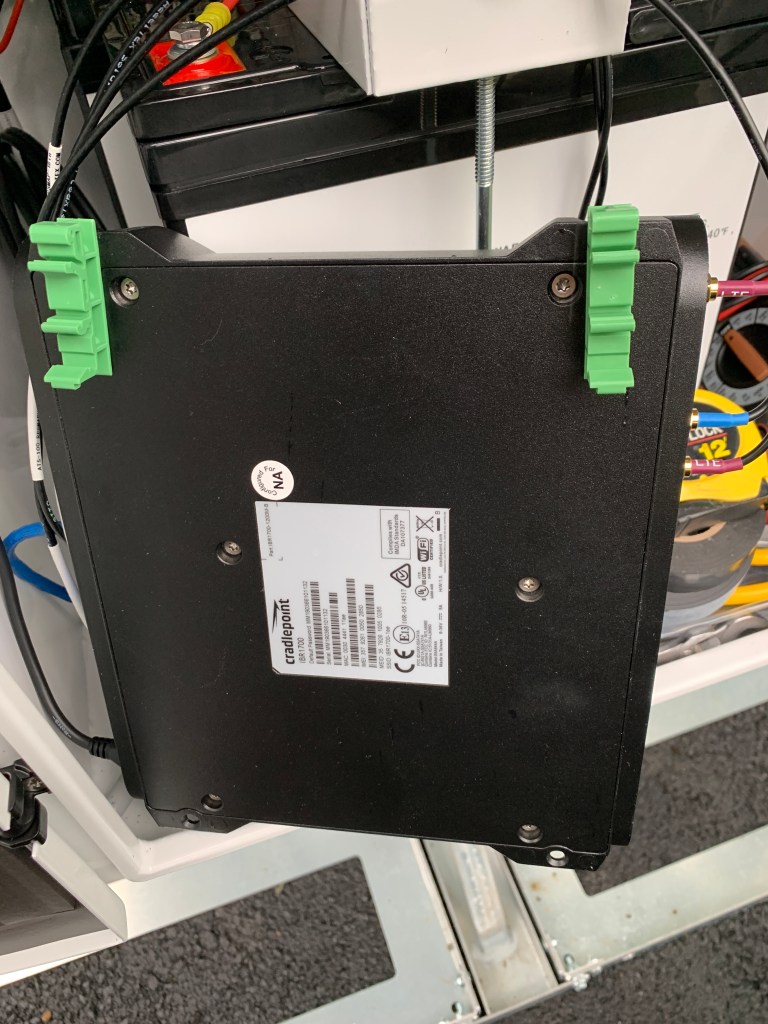
I’m a stickler for clean cabling so I took my time to make sure all of the cabling was tidy and not loose within the enclosure. I was able to take the Cradlepoint router pig tail and create a service loop, which I attached to the DIN rail with a zip tie. I also routed the LTE/GPS leads behind the DIN rail so that both the antenna leads and router pigtail would be hidden behind the Cradlepoint router once it was installed.

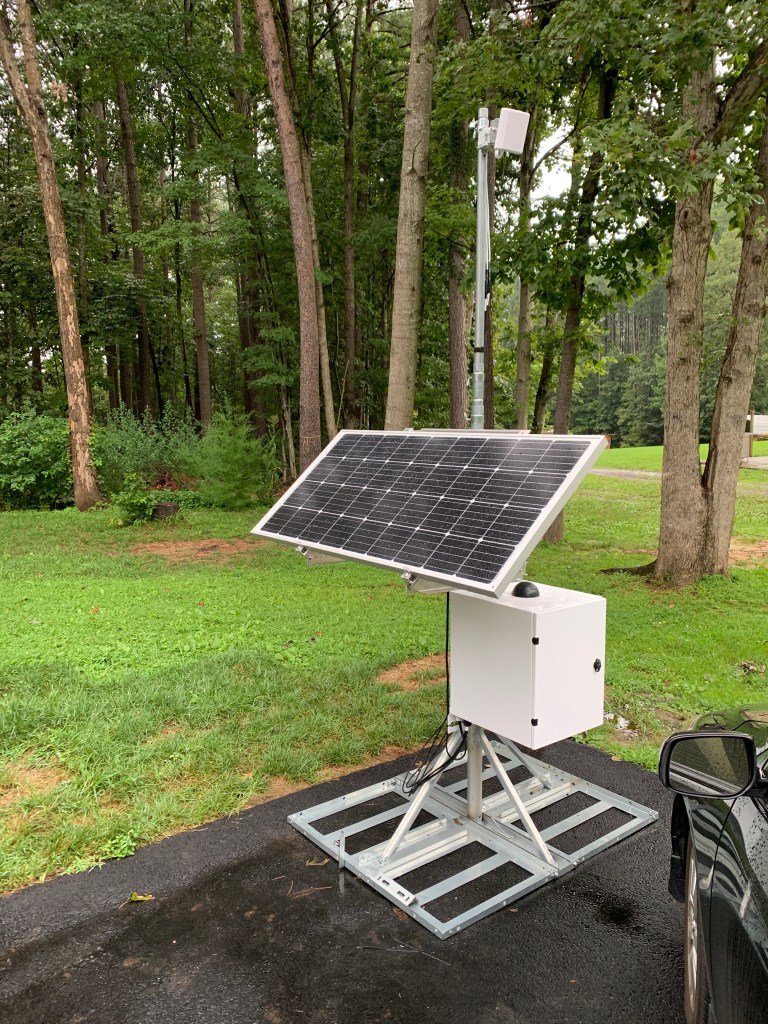
To this point, I had done the assembly in my basement. Once the wiring was complete it was time to move everything outside onto my driveway. Even though it was about 50% assembled, it was pretty heavy. If you plan on placing one of these kits in an elevated location, such as a roof, I would suggest hauling the parts up un-assembled. Our team has been doing just that since the remaining kits arrived and it has been working very well. They have been hoisting all of the materials to their permanent locations with the intent to come back at a later time for assembly. So far it is taking almost as long to lift everything to the roofs as it is to assemble the kits.
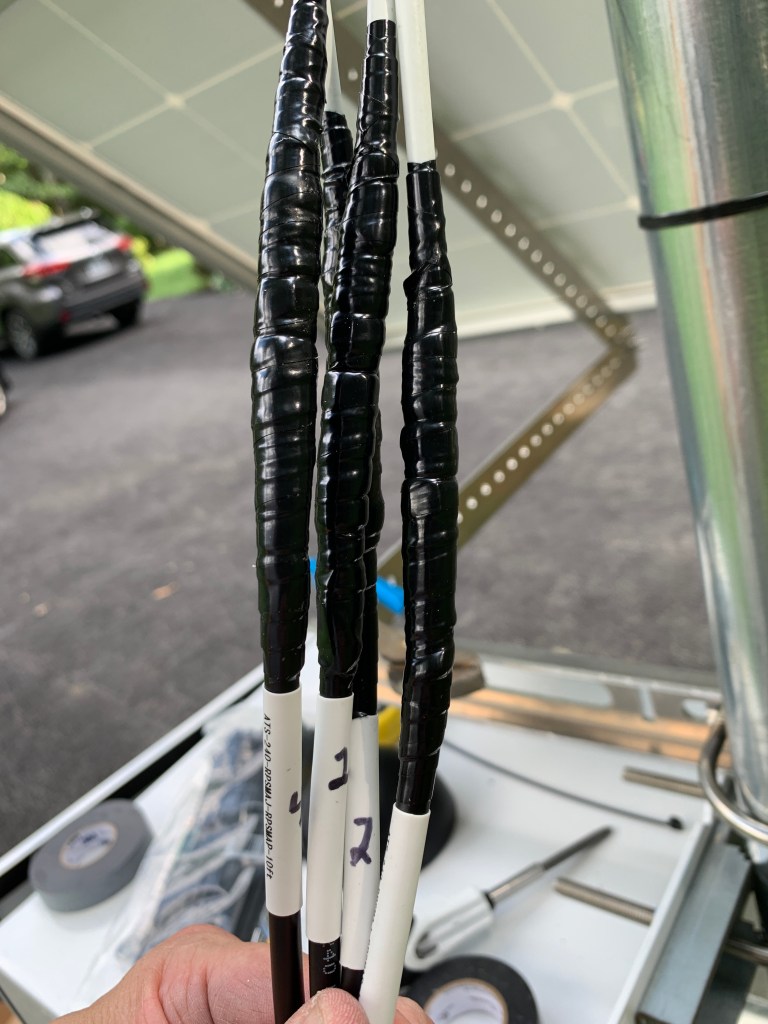
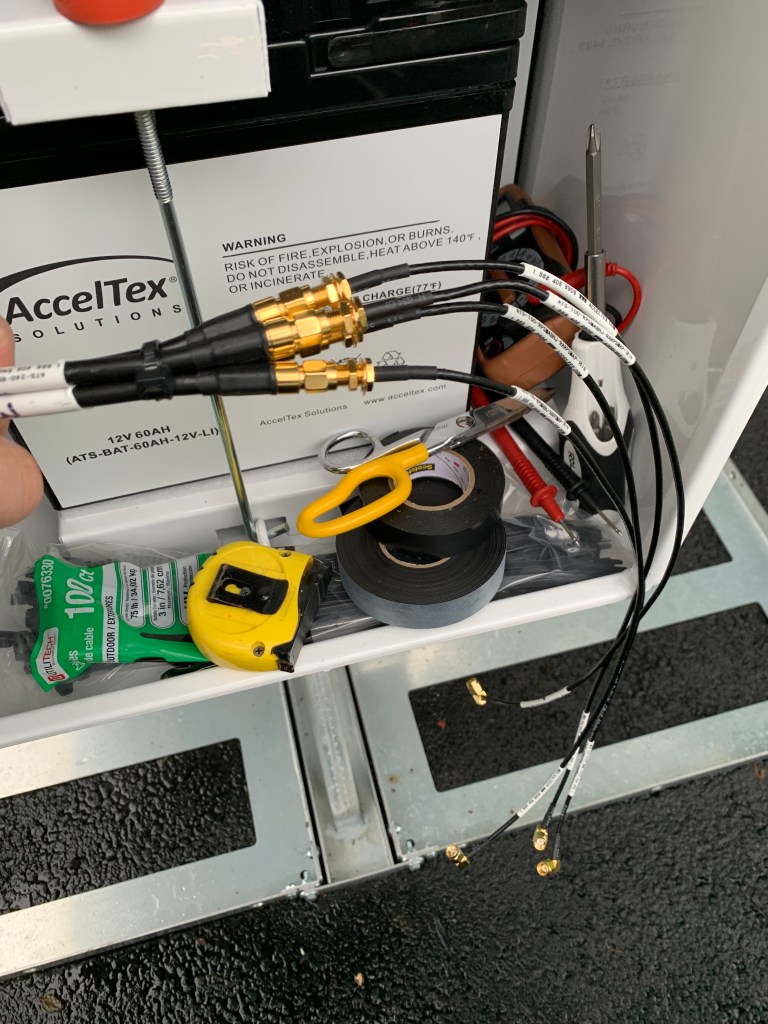
Once I had everything moved outside, there were only a few remaining things to assemble; mainly the solar panel and external wifi antenna. At this point, the most time consuming part of the installation was started. The weatherproofing. Since the mast extends a good distance vertically, cable extension leads were provided in our kits so that the antenna would reach inside the enclosure. I picked up some 3M Temflex and “good” “regular” 3M 700 electrical tape to handle the weather proofing. Once I got the leads unwound and connectors tightened, it took me another 20-30 minutes to properly weatherproof all of the cable leads. Often overlooked, this, in my opinion, is a very important step. This is probably the amateur radio operator in me coming out. After some discussion with my teammates, we decided that weatherproofing the cable assemblies prior to install day would be a timesaver.
Once the leads were assembled and weatherproofed, I mounted the AccelTex ATS-OP-245-47-4RPSP-36, which we affectionately refer to as the “Everyman’s Antenna” because of it’s versatility. In this case, we chose the four lead RP-SMA Everyman’s because the Cradlepoint IBR1700 has four RP-SMA connectors for the wifi antenna and it met our requirements.
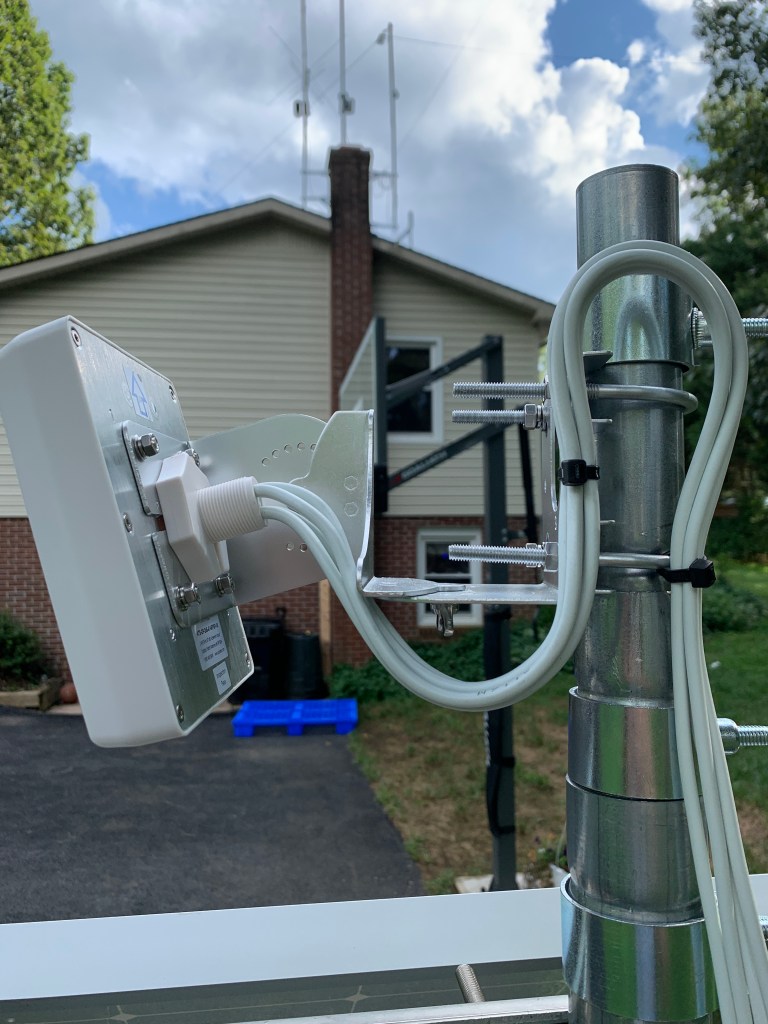
After the antenna was mounted I strapped the leads to the mast with a removable strap, in this case velcro because I didn’t have anything else at the time and I wanted to be able to easily move the mast up or down without having to cut zip ties. I would highly recommend strapping the cables so that they aren’t catching wind and/or rubbing against any metal pieces, which could cause the insulated jacket to fail.
One thing I would potentially recommend to AccelTex would be to include larger cable glands for entry of the antenna leads into the enclosure. The enclosure comes with two cable glands and third blank. One of the cable glands is dedicated for the solar panel wire harness. The four leads that I had for my antenna would not fit through a single cable gland. I have spare cable glands from other projects so I removed the gland that was shipped with the kit and replaced it with a larger M25 gland that accommodated all four leads perfectly. Once I discovered the better fit, I ordered a couple more bags so they could be used in the remaining kits.
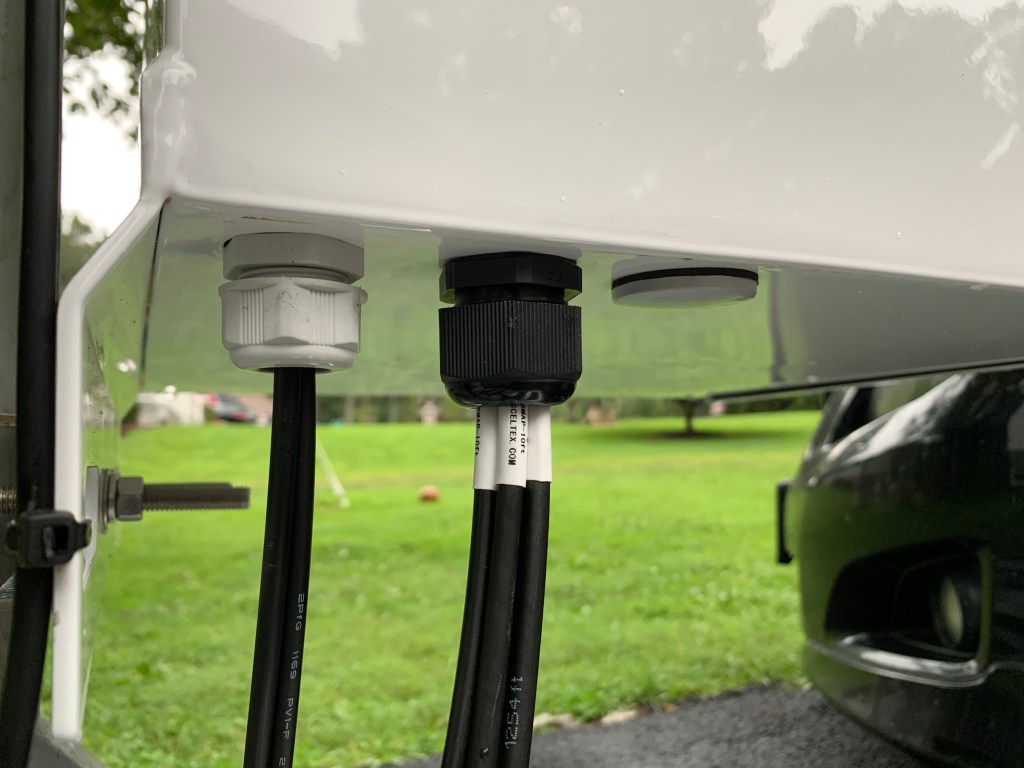
Once I had the antenna leads into the enclosure, I attached smaller, more flexible leads to the existing leads before finally attaching them to the Cradlepoint. I am glad AccelTex includes the smaller diameter leads as it makes for easier cable routing, and an overall nicer install. I tightened these leads to the existing leads but did not weatherproof the connectors because they would remain inside the enclosure. I was able to make sure this would happen by fastening a zip tie around the leads just inside the enclosure. By doing this, the leads could not slip back through the cable gland.
Once I had my cabling in order, I attached the LTE/GPS antenna and wifi antenna leads to the Cradlepoint router and attached it to the DIN rail.
After the router antenna leads were connected, I was mostly done. I had mounted the solar panel earlier, which was relatively straight forward. I tidied up the cables that were on the outside of the enclosure and weatherproofed the solar panel quick connectors that were on the leads. I found out later this was not necessary because the connectors are designed to be weatherproof already.


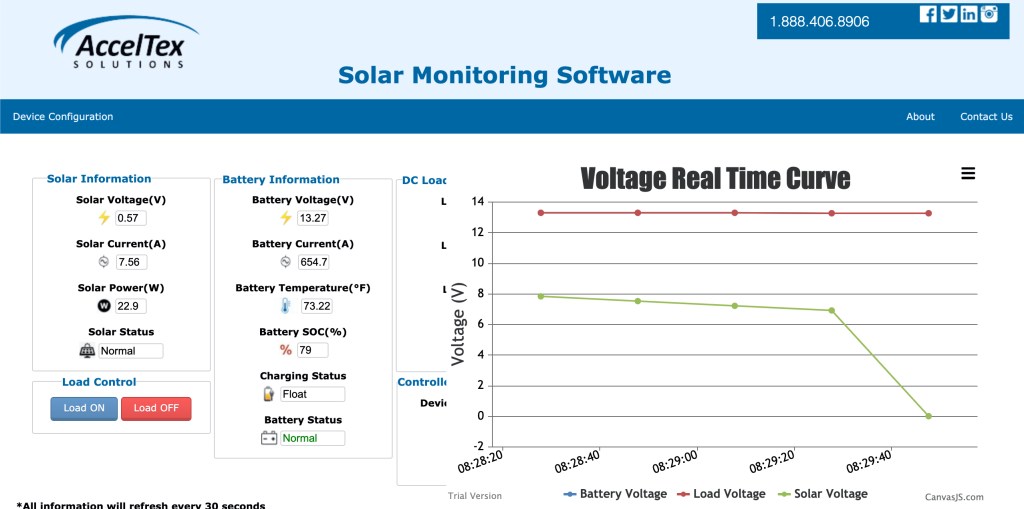
The kit we chose has 160 Ah battery capacity and a 180 W solar panel. We also chose to add on a remote solar monitor so that we could monitor charging and battery conditions at each site. The batteries have been online for almost two weeks, through cloudy days and night time, and have remained online since they were wired up. The battery capacity can be sized to your needs.
Overall, this kit exceeded my expectations. The directions were great, the assembly was straightforward, the parts are high quality, and it looks awesome. Although assembly does require that you have some basic knowledge of wiring and light electrical work, it can be completed by most everyone. Everything went together very well and the first few production units are currently online at their school sites and working well.
In a time with many unknowns and changes that can come at any moment, this kit helped us adapt and get essential network resources outside of our school buildings, reliably, and in a short amount of time. These kits are very versatile and can be placed most anywhere which makes them that much more important right now while school districts are trying to figure out ways to extend their edge outside of their buildings.
As we already know, it is pretty crazy out there right now. I am very blessed and I feel it is somewhat of a responsibility to share knowledge like this right now. If you think this solution could help your rural school district, urban school district, or any other vertical where you need to extend network capabilities during these trying times, please feel free to contact me. I will do what I can to help out and/or try to get you in touch with someone who can. We can get through this if we all work together!
Here are a few more pictures


Awesome job. Keven
LikeLiked by 1 person