
The LinkRunner G2 doesn’t disappoint when it comes to features. A few taps and you have the ability to gather detailed information about your network infrastructure without even opening an SSH session or a door to a network closet.
A quick tap of the NETSCOUT icon in the center of the bottom part of the home screen will open the LinkRunner G2 native testing functions. The one we are going to focus on in this post is AUTOTEST. When selecting AUTOTEST, the LRG2 will began gathering information based on it’s connection to your network whether it be via the 100/1000 BASE-X SFP or the copper 10/100/1000 LAN port.
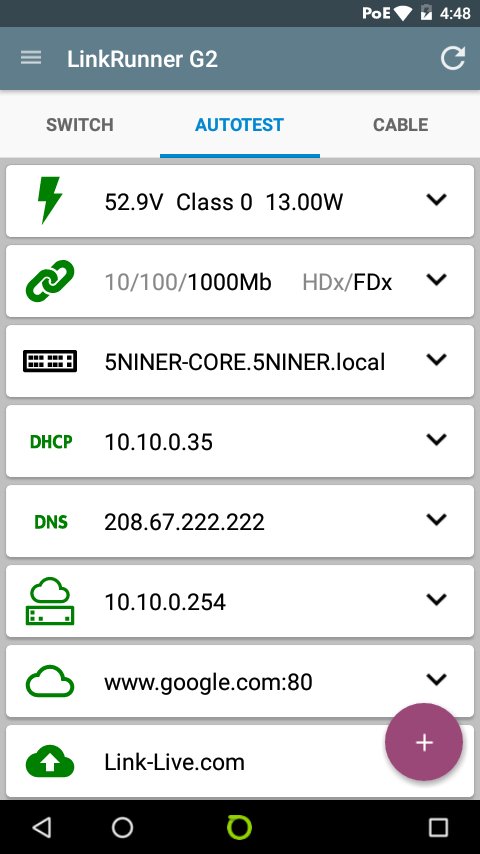
AUTOTEST gathers POE information, switchport speed and duplex, CDP/LLDP information, DHCP, DNS, gateway, internet, and connection to the Link Live website. Each test performed can be expanded to display more details of each test.
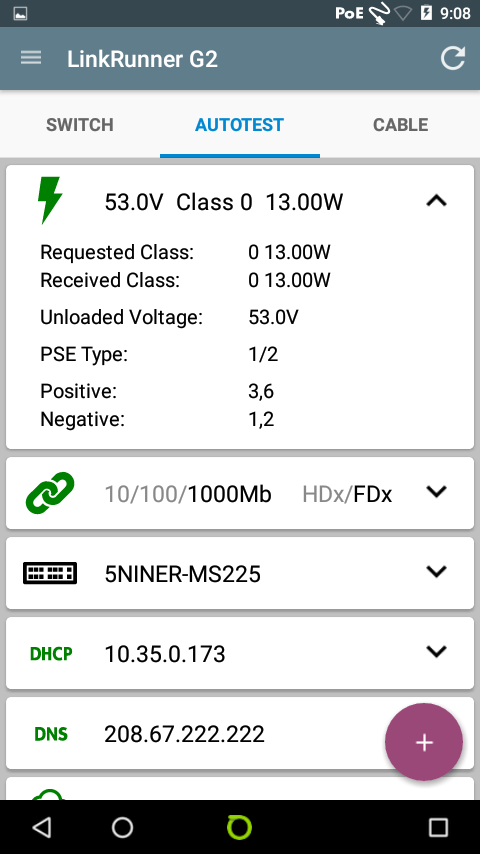
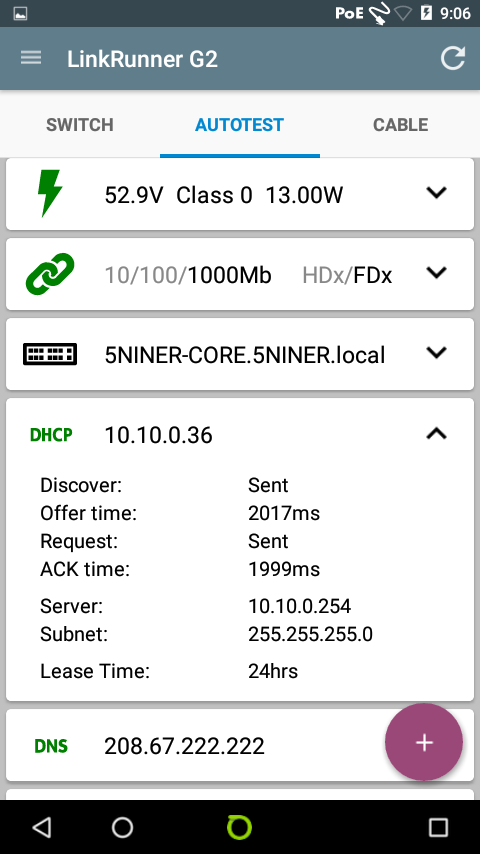
Expanding the POE test reveals the voltage and wattage present and also the POE class. In this example you will see that POE was available on the tested switchport with an available 53 volts and 13 watts.
The next part of AUTOTEST is port speed and duplex. This test will let you know whether the port you are connected to is 10/100/1000 Mbps and also whether the port is operating in a half or full duplex state.
My favorite test in AUTOTEST is the CDP/LLDP test. This test reveals a lot of detailed information pertaining to the switch that you are connected to.
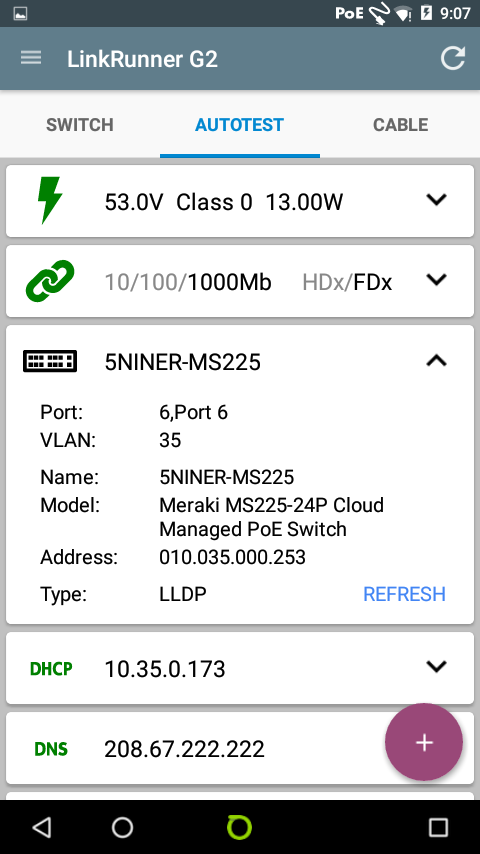
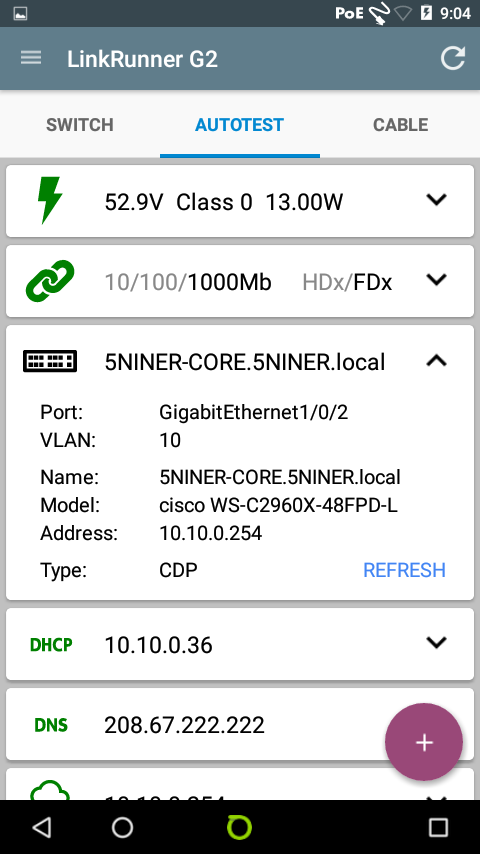
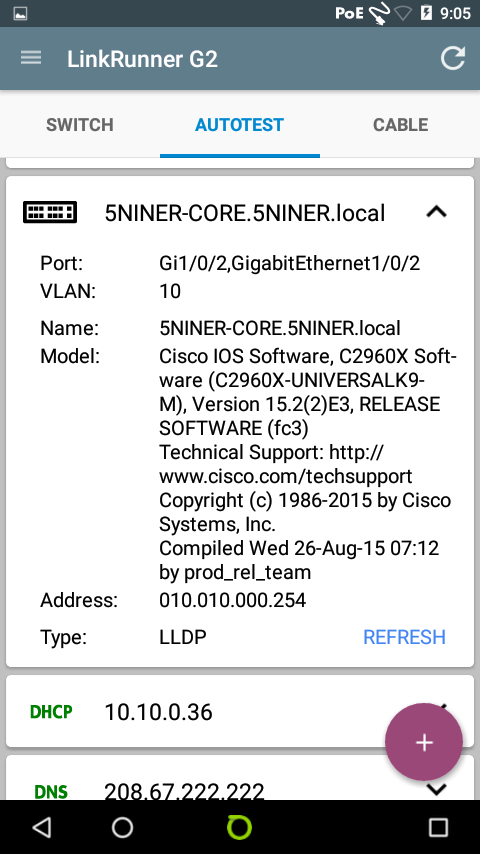
The first image shows the LLDP information collected from a Meraki MS225. The switch’s hostname, vlan membership, and switchport information is displayed. The second image is CDP information from a Cisco 2960X. The information that is given is very similar to that of the LLDP information from the Meraki. The third image is the same Cisco 2960X but this time displaying the LLDP information. You will notice in each example there is a “REFRESH” button that can be tapped. In the case of the Cisco 2960X tapping “REFRESH” toggles between CDP and LLDP. You will also notice in the LLDP information for the 2960X the IOS software version in addition to the hostname, switchport, vlan, and IP address. As you can see, this can be extremely helpful while troubleshooting, all without even being near the switch.
The next two images show DHCP and DNS information that is gathered. This test shows the DHCP offer time and ACK time as well as the DHCP server IP address and lease time. The DNS test shows the primary DNS server and lookup times. This information is obtained very quickly and eliminates the potential need to get other responsible parties involved for DHCP and or DNS details.
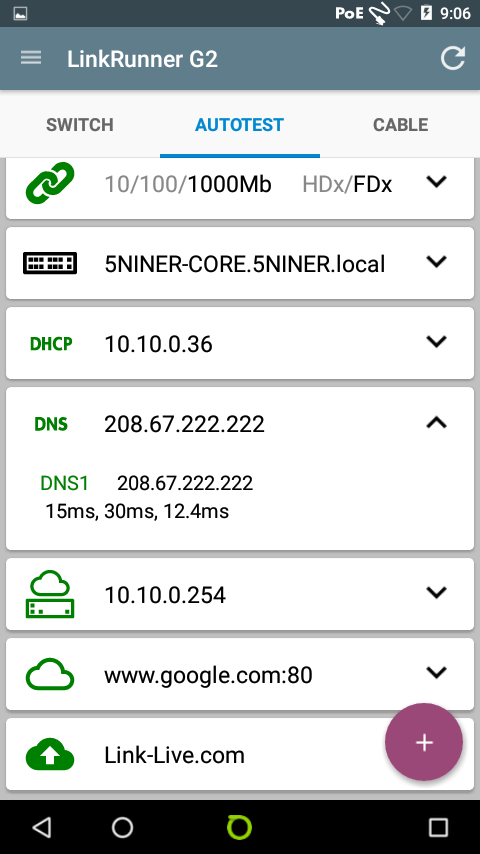
The last three pieces of information under AUTOTEST are gateway, internet connection, and Link Live accessibility. Under the gateway section local gateway information is given as well as the public IP address information and response times. The internet connection test, shown here as “www.google.com:80,” shows the IP address that it has resolved for the name as well as response times. Finally the last test shows that the information has been successfully uploaded to Link-Live.com.
AUTOTEST is a very detailed tool that quickly gets essential network connection information to the network engineer in very short order. The LinkRunner G2 brings all of the test results together into an easy to read screen. Annotations and pictures (remember this thing has a camera!) can also be included with these tests by simply tapping the purple circle with the plus sign, which can also be uploaded to Link Live. The AUTOTEST process takes roughly 10 seconds to complete which is a great advantage because traditionally all of this information would require several different tools and resources to get the job done.
Have I mentioned the LRG2 is CHARGING via POE all while these tests are being performed?

One thought on “NETSCOUT LinkRunner G2; Part 2, Hittin The Switches”